We have vaulted ceilings, I feel there are spaces that are harder to decorate. What to hang? How high do you hang it? I have felt there is this one skinny wall in my kitchen that has been begging for something more.
You see vintage signs & letters all over that are $$$. At first I wanted the word "delic" Or "delis" See, I can't even figure out how to spell it! Plus, it would not fit on the wall.
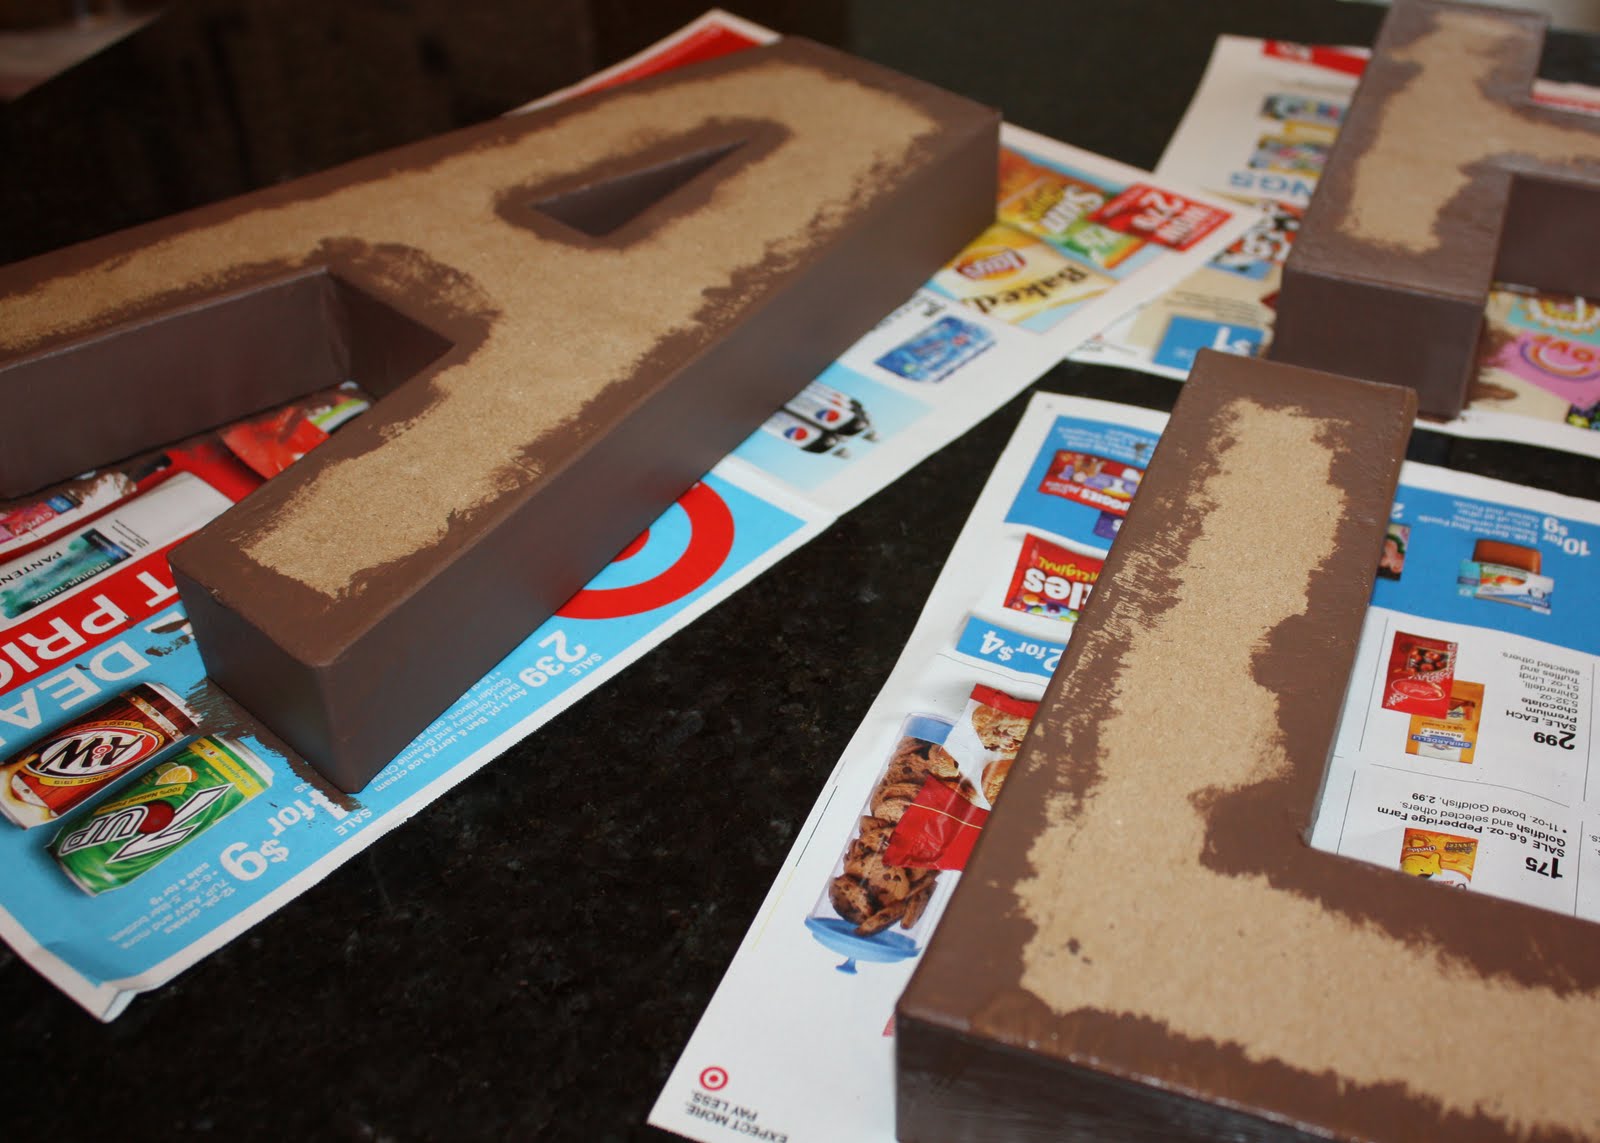
After much deliberating, I decided upon a word. I went to my local JAF & purchased my goods. The 12" letters were on sale for 2.99 each (reg 3.99). I then found 3 sheets of 12x12 scrap book paper that would coordinate with the kitchen, convey the vintage feel & had a "foodie" flair.
Trace the letter on to the paper & cut it out.

Paint the sides of the letters (2 coats). I used a color called "Coffee Bean". I made sure to get the edges real good in case my paper cutting was not spot on.

I used my brown ink pad to antique the cut out letter & Mod Podged them on the letter shapes. After it dried, I used an exacto knife to trim off any excessive overhang of paper. Then I had to do a few spots of touch up paint on the edges where a few nicks occurred.

I used Command picture hanging kit to place letters on wall. This stuff is awesome if you have not tried it. Especially if you are not sure where you want something to go or need to re-position it to be just perfect.

Strategically place the word in kitchen above messy cork board. My husband keeps teasing me we should spell TEA or ATE, depending on the time of day. But he thought they looked nice. (Not that he has any decorating say as part of the pre-nup). HA HA


I did something similar to Peepers room with 6" letters, I just used paint on these, but will someday redecorate (when he gets a big bed... tear) and can repaint or Mog Podge these letter to match his new decor.
FYI the "silly monkey" lettering is from Upper Case Living & the bananas & Monkey are from Michael's


 Step 3: Using moistened sponges, cut them lengthwise into 5 even stripes.
 Step 4: Repeat with 2 more sponges (remember 3 sponges per ball)
 Step 6: Place hair pony in center of sponges ( I wrapped it around 2 times to hold it tight)
 Step 7: Fluff & Enjoy!

 An inexpensive/green alternative to a water balloon or a fun pool toy.


